

Table of Contents

Introduction
I remember the first time I encountered a nasty bug in my code. It was late at night, and I had been staring at my screen for hours, trying to figure out why my application kept crashing. Debugging felt like solving a riddle without all the clues. Fast forward to today, and we live in a world where AI tools like Sonar AI CodeFix are rewriting the rules of software development. These tools promise to take the frustration out of debugging and empower developers to focus on building innovative solutions.
Before diving into enabling Azure OpenAI, take a moment to explore what AI CodeFix is all about. If you're new to it, check out this introductory article to understand how AI CodeFix can transform your development workflow: Introduction to AI CodeFix.
Connecting your Azure OpenAI instance
Prerequisites:
Before you begin, ensure you have the following in place:
- An Active Azure Subscription: You will need an active Azure subscription to access Azure OpenAI services.
- Access to Azure OpenAI Service: Ensure you have been granted access to the Azure OpenAI service and have the necessary permissions to create and manage resources.
- Deployed Azure OpenAI Instance: You should have already deployed an Azure OpenAI instance within your Azure subscription. Make sure you have:
- API Endpoint: The endpoint URL for your deployed Azure OpenAI service.
- API Key: A valid API key to authenticate requests to your Azure OpenAI service.
- Your SonarQube Instance: You need a running instance of SonarQube Server version 2025.2 where you will configure the Azure OpenAI integration. You should have administrator privileges within your org.
Step-by-Step Guide: Enabling Azure OpenAI for AI CodeFix
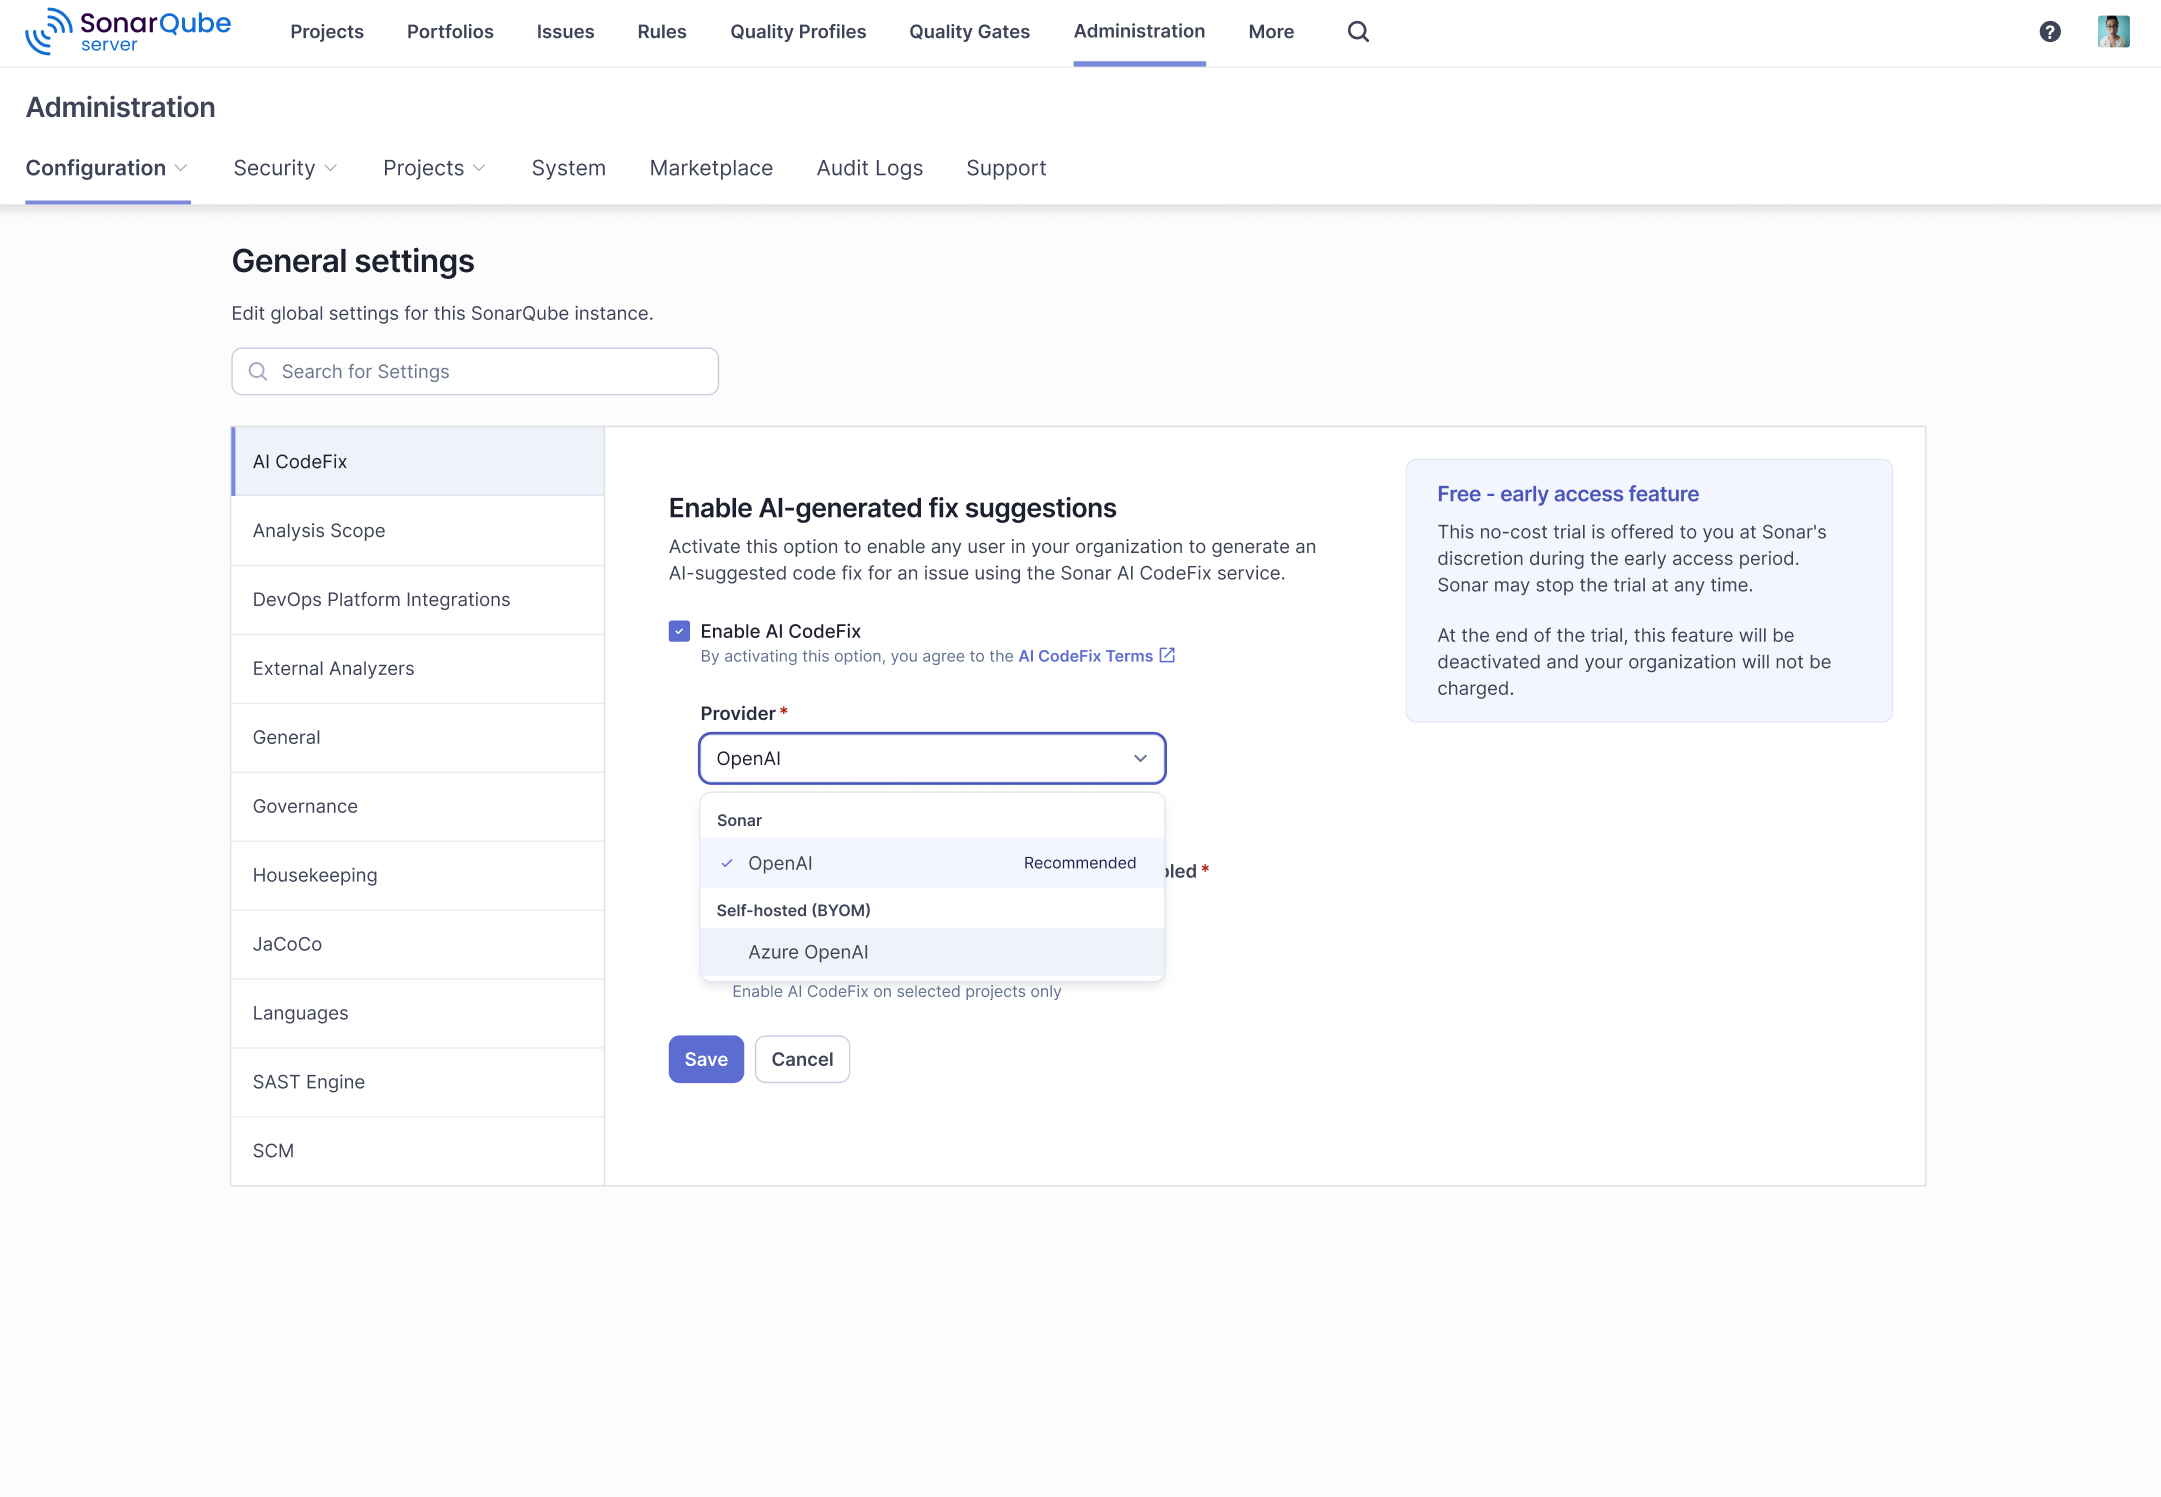
- Access Administration: Log in to your instance as an administrator. Navigate to the Administration section.
- Locate the AI CodeFix Configuration: Within the Administration section, you will see a setting called AI CodeFix.
- Select the check box “Enable AI CodeFix”.
- From the Provider dropdown, select “Azure OpenAI” as the Self-hosted (BYOM) option.

- You will now be presented with fields to input your Azure OpenAI credentials:
- API Endpoint: Enter the API Endpoint URL you obtained from your Azure OpenAI deployment.
- API Key: Paste your Azure OpenAI API Key into the designated field.
- API Endpoint: Enter the API Endpoint URL you obtained from your Azure OpenAI deployment.
- You can either select “All Projects” or “Only selected projects”. For ease, we are selecting all the projects that will have AI CodeFix feature enabled.


- Click on “Save”.
Verifying Azure OpenAI for AI CodeFix
To confirm that Azure OpenAI is successfully powering AI CodeFix:
- Analyze a Project: Run a code analysis on a project that is configured to use AI CodeFix with Azure OpenAI.
- Identify Code Issues: Review the reported code issues. Focus on issue types that are known to be supported by AI CodeFix.
- Request AI Fix Suggestions: For a supported issue, trigger the AI CodeFix functionality.
- Evaluate the Suggestions: Observe the fix suggestions generated by AI CodeFix. With Azure OpenAI enabled, you should see intelligent, context-aware, and potentially more refined fix suggestions compared to using default or less powerful models.
Congratulations! You have successfully enabled Azure OpenAI for AI CodeFix in your platform. With your Azure OpenAI instance, you are taking code quality and developer productivity to the next level, all while maintaining enhanced security and control over your valuable codebase.